The dread of a puncture stops many beginners from relying on their bike to get to work. With a little insight and some planning, punctures can be both a rare and stress-free event. The risk of punctures is largely over-stated and easy to fix.
After a spate of punctures on one of my commuter bikes (old mountain bike) I did a little head-scratching and some information searching. My son was having at least a couple of punctures a month on his KMart bike. After a few tweaks, we’ve been puncture-free for over 3 years now!
How to deal with a puncture on your ride to work
- Preparation is essential. Have the right basic tools and knowledge
- Replacing an innertube is quicker than doing a roadside repair
- Know how to identify the cause of your puncture
- Buy inner-tubes in ‘bulk’, 5 or so. Keep a couple at home, a couple at work and one as part of your on the road repair kit. They are often cheaper bought in a pack saving some $$
- Don’t stress. Just get on with it without irritation. Enjoy the time to catch your breath. The repair will be quicker if you avoid being irritated.
What causes a puncture on my commute ride
There are two types of puncture, the first is known as a pinch-flat, the second is from piercing from a foreign body.
Pinch Flat
A pinch flat occurs either when a tire is under-pressure, or if you hit an object such as a curb or pothole. With insufficient air pressure, the hard object compresses the tire against the wheel rim. The innertube gets trapped between the object, tire and wheel rim and is ‘pinched’.
Piercing from foreign body
This is the most common type of puncture on a well-maintained bike. Typical road culprits are nails, glass and metal shards.
How to tell the difference between a pinch flat and a pierced puncture
A pinch flat will often have two small holes close together in a line. You will also be unable to find a hole in the tire itself or any object in the tire.
A puncture from a foreign object such as a nail or glass will usually leave a single hole in the inner tube. You may also be able to spot a hole in the tire itself. It’s much more apparent if the object is still stuck in the tire of course!
Preparing for a puncture on your commute
Preparation is key. There is no point relying on your bike to get you to work without carrying a few essential tools. Like a car should have a spare wheel and a jack and lug wrench, a cyclist should carry a few essentials.
Our experience its less effort and quicker to outright swap a tube than try a roadside repair. We don’t generally carry a puncture repair kit, unless out for a very long weekend ride. Replacing an innertube on a cold commute isn’t too bad, trying to patch an innertube in the cold and wet will try anyone’s patience.
Carrying a spare innertube that is pretty lightweight and easy to stow allows you to get going quickly and will enable you to do a better repair job at work or home.
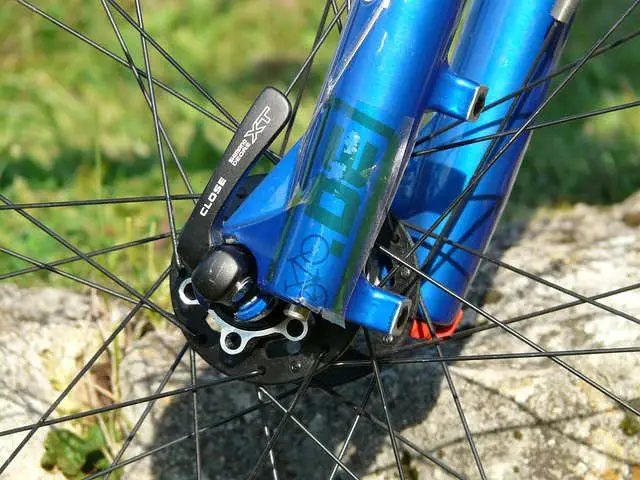
Know in advance if your bike has quick-release wheels or wheels that need a wrench to remove the locking nut.
What should be in a bike repair kit
A small carry everywhere bike repair kit for commuters should contain
- Lightweight tire lever set (3 tire levers)
- Duct tape (never underestimate the uses of Duct tape!)
- At least one spare inner tube
- Patch kit (optional)
- A couple of latex/Latex-free gloves (keep hands and clothes clean and blood free!)
- A good lightweight tire pump
- A good quality cycling specific multi-tool
Top tip: Snap a pencil in half and then wrap 20 to 30 turns of duct tape around it for a lightweight, convenient way to carry duct tape.
Put all the kit into a small bag that’s either stashed in your backpack or on your bike. Underseat bags are a good idea.
Don’t cheap-out on a good bike pump. You don’t need to be extravagant. A lightweight metal-bodied mini-pump with dual action is perfect. The double-action means it pushes air into the tire on the inward and outward stroke.
We love Park Tools maintenance tools for a good compromise of cost and quality. If you love more expensive, shiny gadgets (Park Tools or others), there are plenty of options too!
How to quickly repair a flat tire on your bike
- Remove the wheel from the bike using either the quick-release lever or using a wrench. Note if it’s the rear tire you will need to move the wheel past the rear derailleur. The Latex gloves will save your hands from oil and grime!
- Fully deflect the tire is it isn’t already.
- Using the tire levers, insert one tire lever between the wheel rim and tire to ‘pop’ the tire off the rim. Hook that tire level in place on an adjacent wheel spoke.
- Insert another tire level adjacent to the existing tire level and gently slide it around the wheel rim, ‘popping’ the tire off the wheel.
- Push the tire valve (the part you use to inflate), through the hole in the wheel rim and remove the innertube.
- Visually check the tire for any foreign objects and CAREFULLY, run your gloved fingers around the inside of the tire to check for any objects in the tire.
- Run your gloved fingers CAREFULLY along the inside of the wheel rim to check for any objects in there. Visually check the rim tape, which protects the innertube from the heads of the wheel spokes is in place and undamaged. If damaged, trusty Duct tape can suffice as a quick repair.
- Insert the replacement innertube by pushing the valve through the hole in the wheel rim first. Then carefully tucking the innertube into the tire and wheel. Be careful not to twist or trap the innertube.
- Partially re-inflate the innertube to give it ‘shape’. This helps stop the inner tube becoming pinched when replacing the tire. It also helps to prevent the tire valve from dropping back through the rim or twisting.
- Grab the top edge of the wheel and ‘pop’ the tire back onto the rim.
- Keeping one hand at the top of the wheel, slowly rotate the wheel, popping the tire back onto the wheel.
- Fully re-inflate the tire, checking the tire remains correctly seated on the wheel rim
- Replace the wheel on the bike, checking for a secure fit of the wheel and the wheel is not catching on the brake pads. If it is re-loosen the wheel, realign and tighten.
Bike tire problems
Sadly many new cyclists have a poor experience with bike reliability, in particular, punctures. A significant reason for this is buying what appears to be a shiny new and cheap bike from large outlet stores.
The bikes in the big stores look shiny, they have all the fancy parts (suspension) and so on you see in higher-end bikes. And some even carry great brand names and component names in the visible areas. It is not uncommon to see ‘Shimano’ on the gear shift on the handlebars, yet some unknown brand on the derailleur.
A good Craigslist or eBay secondhand purchase if often a better long term bike than a shiny cheap bike-in-a-box.
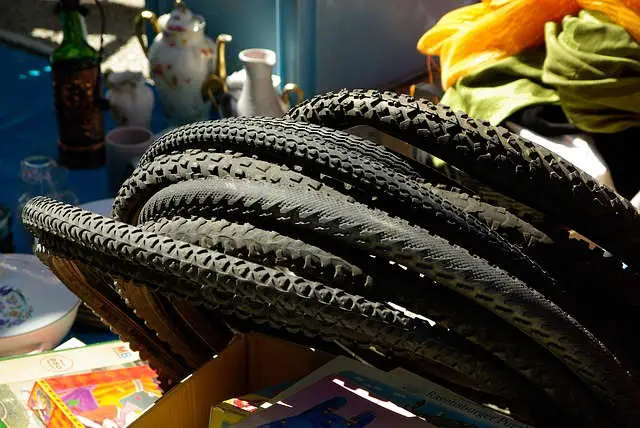
Sadly the tires on these bikes LOOK the part but are incredibly cheap to manufacture and are made for looks, not endurance or puncture resistance. We often have to advise disgruntled beginners to seek out some better rubber on their wheels to bring some reliable joy onto their cycling.
Pretty much any tire is a step upwards from what is on those large store bikes. Better tires come with multiple layers of material to give strength and rigidity to the tires, as well as improving puncture resistance. Some tires include kevlar layers to further protect against puncture.
Changing tires also gives you the chance to get some tires that suit the bulk of your riding. For example, replacing those knobbly-looking but slow tires for some street slick commuting tires. If you are riding a big store-purchased bike, get the innertubes replaced at the same time – again the quality difference is huge.
Don’t go mad with the $$ when doing this, almost any aftermarket replacement tire is better than the crap that comes with those bike-in-a-box deals from large outlets.
Cheap tires aren’t the only culprit. Over time tires wear down. In particular rear tires if you like to lock up the back wheel once in a while. Replace a tire before the tread wears away to avoid punctures!
Tires also age, if a tire is over 5 years old, start to look to replace it. Squeeze the tire and if you see any cracking in the tire, have it replaced. Once a week check over the tire for any bulges or any pieces of stone, glass or nails.
Why do I keep getting punctures on my bike
If we have ruled out cheap, worn or old bike tires (above), there are a few causes to investigate.
Tire pressure. Check the rating on the tire and make sure you are running at a tire pressure under the max rating. If you are getting flats without any obvious signs of tire damage, nails, glass etc. you may be getting pinch flats. Increase tire pressure.
If you don’t have a tire-pressure gauge, then the pinch test is a quick and easy check, squeeze the tire walls. They should be firm, but compressible with just one finger on each side of the tire. We’d also recommend grabbing a tire pressure gauge. The ones fitted to tire pumps are often very inaccurate.
Rim Tape
If you have ruled out the above. Remove the wheel and tire. Within the wheel rim, there should be rim tape all around the inside of the rim. This protects the innertube from the screw heads of the wheel spokes. Visually check the rim tape is in a good state and check for any evidence of wheel spokes pushing through the tape.
Replace the rim tape is damaged. Add rim tape if it is missing, I’ve seen wheels missing tape in a number of bike-in-a-box purchases!
Wheel damage
Check the wheel rim for damage, if you have hit anything hard the wheel rim could be cracked or dented forming a sharp edge on the inside of the wheel rim. Don’t ride on a damaged wheel. There’s a high chance it will fail at exactly the wrong moment. Usually when you have to hit the brakes hard!
Tire Valve
Less frequently the culprit, the tire valve may be the cause of a flat if all other options are ruled out. Tire valve issues normally result in slow punctures over several days.
How do you avoid punctures
Riding position and style can have a big impact on the number of punctures you encounter. Check the local cycling laws in your Country or State in regards to where on the road you should cycle.
We see many beginner cyclists ride far too close into the side of the road. In the edge of the road all the glass, nails and debris accumulate. Riding an extra foot (30cm) out can move you from riding in the roadside junkyard to riding in the smooth.
Keep your eyes open for debris when riding. Seems obvious, but if you see debris in time avoid riding through it if it’s safe to do so (don’t swing out into the road traffic).
If you can’t avoid an area of debris, ride through, keeping your wheels straight, rather than trying to weave through. Weaving essentially ‘scrubs’ the debris into your tire.
Have fun and a little respect. Riding into curbs and potholes, locking up wheels are obvious ways to increase tire wear and possibility of puncture. Have fun, but don’t get mad if it results on a pinch flat etc.
Check your tires regularly, a 60 second squeeze test for pressure, a check for any stones, or glass stuck in the tire thread and any bulges can save you a roadside pitstop.
How long does it take for a puncture repair to dry
Check the label on the adhesive that comes with your puncture repair kit. Typically a puncture repair takes at least five minutes to dry.
lcc.org.uk have a great short guide to puncture repair if you are looking to repair an innertube.
A successful puncture repair depends on the effort put into cleaning and prepping the repair area. A repair can be a fiddly task and depending on the cost of a replacement innertube not worth the effort.
Pre-glued puncture patching kits are easier to use than the ones with separate adhesive.
Occasionally I’ve had puncture repairs fail over time, so our preference is to have a good unpatched innertube in our tires. If needed, keep the patched tube for a spare.
Share your top puncture repair or prevent tips in the comments below.